This page offers information and advice on conducting meetings in DAERA conference rooms equipped with the MX800 video conferencing device.
Meeting etiquette
Refer to our meeting etiquette guide to help ensure that meetings are productive and focussed.
Connecting your laptop
Assumption
- You have activated the video conferencing (VC) unit
- You have turned on the LCD screens
Using the cables provided on the desk connect your laptop using
- VGA, Display Port Converter or HDMI connection
- Network
You should see your desktop on the left hand screen
If not
- Using the Touchpad controller press the 'Present' icon to share your screen. You may need to pick an input source if another device is connected.

- Pressing it again should stop you sharing your screen
If not
- Remove and replace the connection into your laptop
You should see your desktop on the left hand screen
Note
Each time you connect your laptop you should see a message appearing, 'New Presentation Source Connected' on the bottom corner of the Video Unit screen. If not press the 'Present' icon on the Touchpad controller or try disconnecting and reconnecting the cable.
Joining a WebEx meeting using a Video Conferencing (VC) Unit
Assumption – on entering the VC meeting room
- WebEx Board Pro and WebEx Board’s should automatically detect your presence on entering the meeting room and display scheduled meetings on screen and touch pad.
- For SX20’s SX10’s you have turned on the VC screens using the TV remote controller, source should be set at HDMI 1
- You have activated the VC unit by tapping the touch controller screen or shaking the Cisco remote controller to wake up the VC Unit/camera
To join meeting
- If the meeting room has been included in the WebEx meeting invite you should see on the screen an invite to Join Meeting, simply select Join Meeting or
- If the meeting room has not been included in the WebEx meeting invite you should enter the 11 digit number in the WebEx meeting invite
Sharing your screen
Hardwired
- On the desk you should use the cables provided to connect your laptop, see below
Wireless
- Your Laptop has Wi-Fi turned on
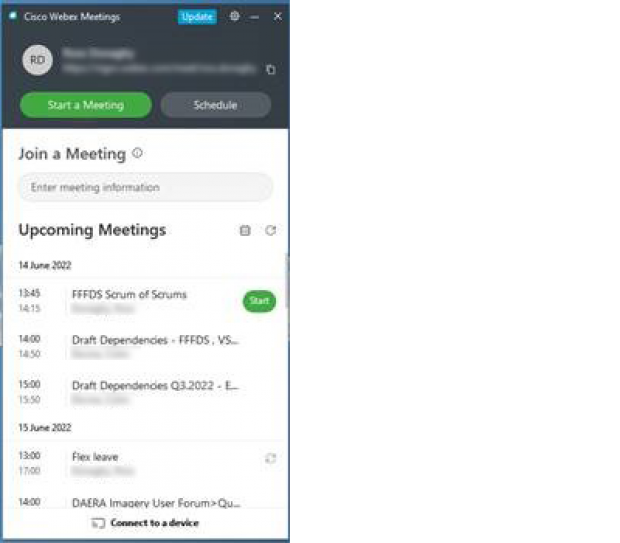
- You have Cisco WebEx Meetings running on your laptop

- The VC unit will automatically scan for laptops within the room and display them - if not...
- Select Connect to a Device
- Enter the VC Name, as you type the units within your area should start to appear
- Select the VC Unit you want to connect to
- Note: Wireless sharing is only available on higher spec laptop models and doesn’t always work. It’s somewhat temperamental. A hardwired HDMI connection is recommended
Adding a VC unit to a meeting invite
- When you are setting up a WebEx meeting you will be able to add the VC unit by selecting All Rooms from the Address Book and then select the VC meeting room and add to the required attendees.
- **This facility only works with MS Teams if the VC Unit has a Touch10 or room navigator connected**

- On entering the VC meeting room you will see the booking displayed
- You can start the meeting 5 minutes before it is due to commence by either saying “OK Webex, join meeting” or by pressing the “Join” button on the control pad (iPad) on the desk in the meeting room.
- For MS Teams someone needs to be in the meeting to admit the Video Conferencing Unit to the meeting, the meeting room will wait in the “lobby” on MS Teams until it is admitted
Signing into your host account
Important information for Webex host account users
From 31st October 2022, IT Assist will begin deploying a new Cisco Webex desktop application to 1000 hosts per working day.
As part of the deployment process, host account users will be required to sign into the new application.
There are some changes in the new application
- Host users can schedule meetings directly in the new application.
- This is not linked to our Global address list, you will need to enter a participants full email address, if they are not a current Webex host user.
- Only meetings scheduled through the new application will appear in the application.
- All meetings will appear in your outlook calendar, provided your accept the email invite
- Scheduling meetings via Outlook will no longer be available after the 17th November
User guides available at http://itassist.intranet.nigov.net/how-to-guides/cisco-webex-meetings
- Webex App – Schedule a meeting
- Webex App – Settings on the app
- Webex App – Signing into your host account on the new app
- Webex App – Personal Rooms on the new app
There can be a significant delay signing into the application please be patient.
If you have forgotten your password you can reset it by clicking on the forgot password link.
- You will receive a code to the inbox of email address for the host account.
- Enter the code to reset your password.
- If you are using a shared email address you will need to inform the other users of the new password for the account.
